To Strip Down and Refinish Your Sailboat's Deck
Projects on my boat come and go like a perennial bloom of to-do’s that sprout up where and when they choose. “Repaint decks” seemed to live on the list in perpetuity. Part-grey, part-aqua marine, and part no-paint-at-all, they lay underfoot chipped and peeling and waiting for attention.
It was a daunting task. How far down do you strip off the old nonskid? Do you remove every fitting, even those 50-year-old brass clamshell vents? How do you sand, tape, prep, and prime? “There are two kinds of boats,” my friend Chris likes to say. “Boats that look pretty and boats that go places.” My boat goes places—but pretty isn’t such a bad aspiration.
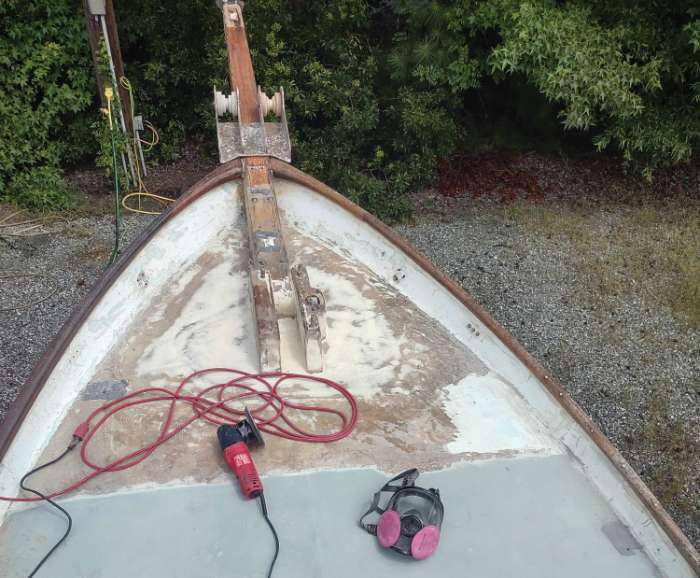
Work started on the foredeck, where an old bowsprit adjustment had created a dip in the decking under the windlass. I attacked the surface with 40-grit sanding disks, clearing away the easiest of the nonskid. With a straightedge I was able to determine where the dip began and ended, and I outlined the area and used an angle grinder to prep the surface. Concentric sheets of fiberglass soon filled the void, and a nicely sanded layer of fairing completed the repair.
Off came the stainless stanchions as I ran back and forth from belowdecks to topsides, playing both roles in a two-person play. The bronze water fill came off the foredeck, but farther aft the two fuel fill caps resisted removal. Fine. They may stay. I am a pragmatist, after all. Perhaps this is why my Ave will never make the centerfold.
I wanted a deck finish that was uniform, well adhered, and that had aggressive non-skid characteristics without being painful to walk on. I decided to use KiwiGrip, sold on its purported high-quality adhesion, its one-part formula, and the fact that I could control the texture in the application process.
This painting began with me hoping to sand and grind the decks down to a factory-perfect surface that was ready to paint. That dream survived about 10 minutes of effort after which it went right in the rubbish bin next to the hope of removing the clamshell vents and fuel fills. I opted instead to sand it all aggressively—what came loose got swept away and what stayed behind stayed. That was my own line of demarcation, where effort in was worth the expected results out.
I worked my way aft, scraping sheets of nonskid off with a putty knife and sanding whatever remained until I decided it was fruitless to pursue more. Clasps and hinges came off lockers. Flaking paint came off the coaming. The array of old nonskid colors came off the bridge deck, lazarette, and tiller box.
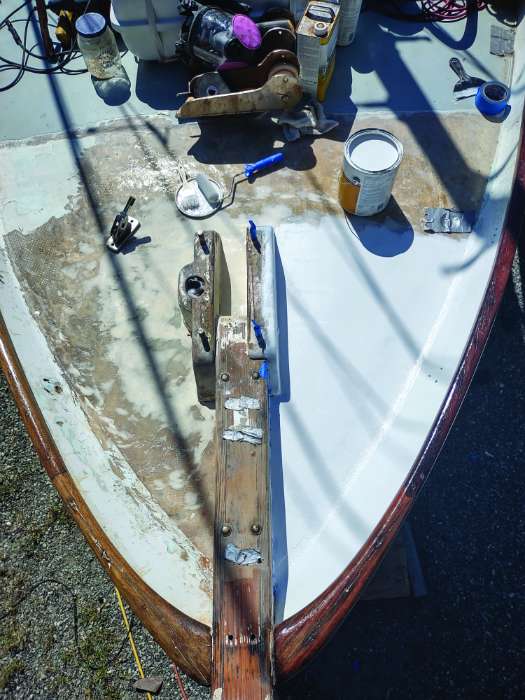
Satisfied that what could easily go had gone and that what stayed behind was there to stay, I prepped for painting. After a thorough vacuuming, the decks were wiped with denatured alcohol and taped for priming. Another pass, this time with acetone, released the remaining grime and gave the primer a good surface to adhere to.
Every inch got primed. When the primer had cured, the areas not slated for non-skid got two heavy coats of Brightsides. Two days later, after another denatured alcohol rubdown, I taped off the outlines of the non-skid areas and started applying the KiwiGrip.
KiwiGrip is rolled on flat and achieves its texture through the application of a texturized roller over partially cured paint. The thickness of the base paint application, how long it cures before being texturized, and the pressure you apply with the texturizing roller all impact the shape and feel of the eventual surface. The application of KiwiGrip, as is probably true for all non-skid paints, takes getting used to. While these paints aren’t cheap, you’ll want to dedicate a bit of your stock to practice with off-boat until you have the basics down.
As a singlehander, my relationship with the topsides of my boat seems especially important. The deck surface is part of how I interact with the boat, and I may crave different tactile feedback depending on where I am and what I am doing—standing to winch a halyard or reef the main, kneeling for balance, or positioning myself to transfer from the coach roof to the side decks. I started on the least important sections, learning the nuance of the paint and texturizing roller as I went. Working in small sections, I put a gentle orange peel finish on the cockpit lockers and bridge deck and a more aggressive peak on the areas where the traction matters more.

I can still walk my decks barefoot, as I tend to do, and a year later they look hardly worse for wear. It is an intensive undertaking to strip down and redo the decks of an old boat, and the biggest challenge might just be getting the job a spot at the top of the to-do list. If you do, the rewards are remarkable. ~By John Herlig
Lessons Learned
- Practice controlling the paint texture on plywood or other scrap before starting the decks.
- Temperature and humidity matter. The paint reacts differently at noon than it does at 9 a.m.
- Especially with KiwiGrip, work in small, manageable sections.
- Surface prep matters, but texturized non-skid will hide some imperfections.
- Do not let the paint fully cure before removing painter’s tape.
Find more How-To articles for sailors here.


