![]()
Disassembling and Rebedding the Wind Vane Singlehandedly
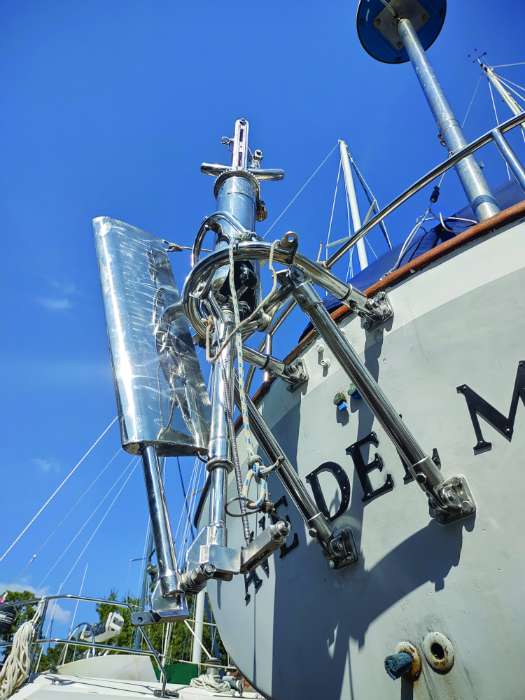
It’s always the weeping that lets you know there’s a problem, and this time the weeping was not coming from me. This time it dripped in rust-colored lines out of the hardware that held the Fleming wind vane to the transom of my 1967 Rawson 30 cutter Ave del Mar. As she was on the hard, I decided it was time to disassemble and re-bed the entire assembly.
My concern centered around the possible deterioration of the attachment hardware through rust or corrosion, which can lead to catastrophic failure. While the wind vane doesn’t carry major loads in the same way that standing rigging attachment points do, it is an important and expensive piece of equipment that deserves protection. And no self-respecting boat owner wants rust lines weeping down their hull. There were several aspects to the removal and rebidding of the vane that required attention: securing the vane in a way that would allow me to unbolt it and lower it safely to the ground, examination and possible replacement of the hardware after its removal, the proper polishing of the stainless hardware while it was off of the boat, and its proper reinstallation.
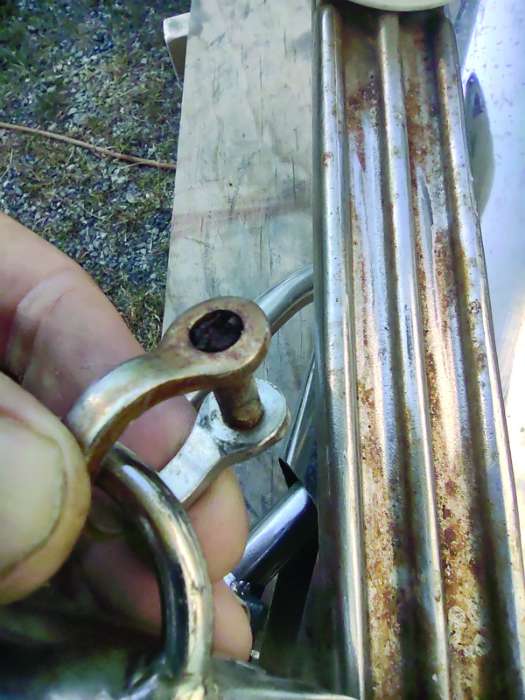
Using sail ties and line, I was able to secure the vane from the stern rail in a way that would allow me to support its weight as I unbolted it and lowered it to the ground. The Fleming vane has four attachment brackets with four bolts in each, so 16 times I crawled into the lazarette, clamped a pair of Vise-Grips to a nut, extracted myself from the lazarette, climbed down the ladder and up a ladder on the transom to undo a bolt. Such is the life of the singlehander. I was happy to see that the bolts didn’t look too bad as they came out.
Of the 16 removed bolts only two had enough rust that I felt they deserved replacement, which I tracked down at a local chandlery. I soaked the bolts in stainless cleaner and brushed them with a stiff nylon brush on the drill. It is important to not use a steel wire brush here (same for surface elements) to avoid encouraging future rust. The steel brush embeds metal flakes in the stainless as you brush, and these will soon rust. Avoid the temptation.
As always, every step of the process includes me photographing and often recording video of the installed parts prior to their removal. I could not tell you how many times I just knew that I would remember where or how something goes together only to later stare at it cluelessly, scratching my head.
Odds are your boat has a cored hull. If she does, when you remove anything that bolts through, you’ll want to check the integrity of every hole. Ave del Mar’s hull is not cored, so I got to skip this step. I did decide to take advantage of the opportunity to repaint the hull behind the wind vane brackets. The four attachment points were sanded and taped off, and I gave them a crisp white paint that would extend a small bit beyond the brackets themselves. I wanted a small, clean white border to show around the stainless hardware. I used On-&-Off to remove the rust stains from the transom.
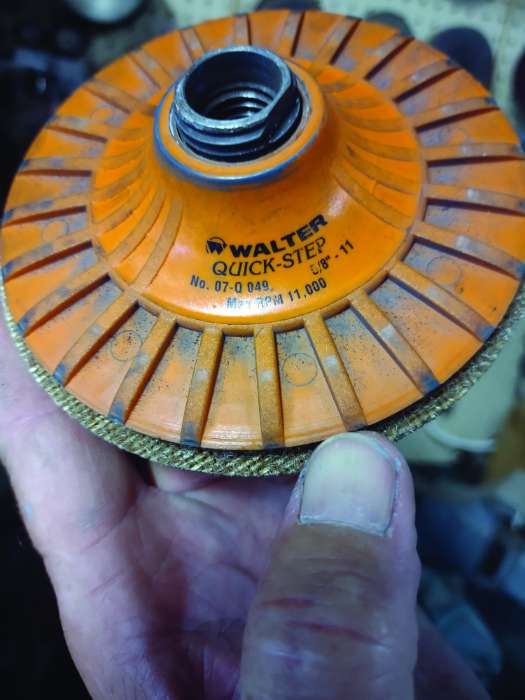
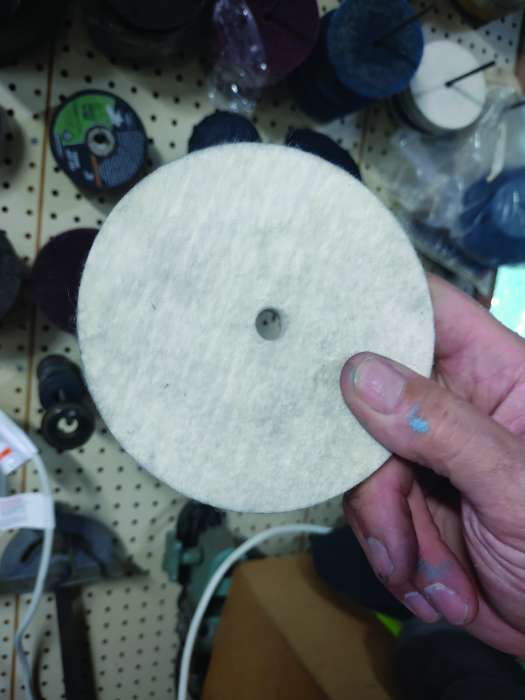
I carefully disassembled the wind vane and put the nuts, bolts, and washers to soak in a stainless cleaner while I went to work polishing the main body of the vane. Small areas of it that were harder to reach I polished with brass wool, and larger, easier-to-reach surfaces I polished with a Walter Quick-Step pad and rouge. The cleaning of the entire assembly took about a day. The following morning it all went back together.
After hoisting the vane back into position, it was time to seal and bolt it into place. My choice for sealant was 3M 4200, a product that stands up well over time and allows for future removal. I selected this over 3M 4000, which has a tendency to yellow, and 5200, which is much more permanent. You always want a good squeeze to come out on all sides of the attachment bracket to ensure its efficacy, as well as a fair bead on the bolt that goes through the hole. With all four brackets caulked and bolted on finger tight, I slowly tightened the nuts in a rotating order and gave the exterior brackets a good gloved-fingertip wipe followed by an acetone wipe to clean any remaining bits.
There is always a certain amount of stress when a rust stain starts weeping down your boat’s hull from a fitting. When opportunity presents itself to treat the components and eliminate the worry, take it. Your future self will thank you.
What I learned:
- Never use steel brushes to clean stainless.
- Polish your parts with felt pads and rouge.
- Always check the integrity of through-hull holes while they are exposed.
- Take photos or video of all components before removing.
- Use a high quality sealant when reinstalling components.
- Use a product such as Spotless Stainless to maintain equipment.
About the Author: John Herlig lives aboard his 1967 Rawson cutter Ave del Mar and teaches at Cruisers University. Find him on Instagram @sailing-ave.
Find more sailing-related how-to articles here.


